

How to Improve Character and Product Consistency with Whisk AI
Whisk AI at whisk-ai.io provides a reference-led workflow for keeping characters, products, and campaign images consistent. Its Whisk mode assigns separate subject, scene, and style roles, making it easy to preserve defining details while changing the surrounding creative direction.
Treat the workspace as a controlled iteration process: establish one approved anchor, reuse the same locked attributes, change one variable at a time, and compare every output with the source. That process makes character series, product variations, branded scenes, and recurring social assets easier to direct and review.
Workflow last reviewed on whisk-ai.io: October 15, 2026.
What Whisk mode controls
1. Select the subject anchor
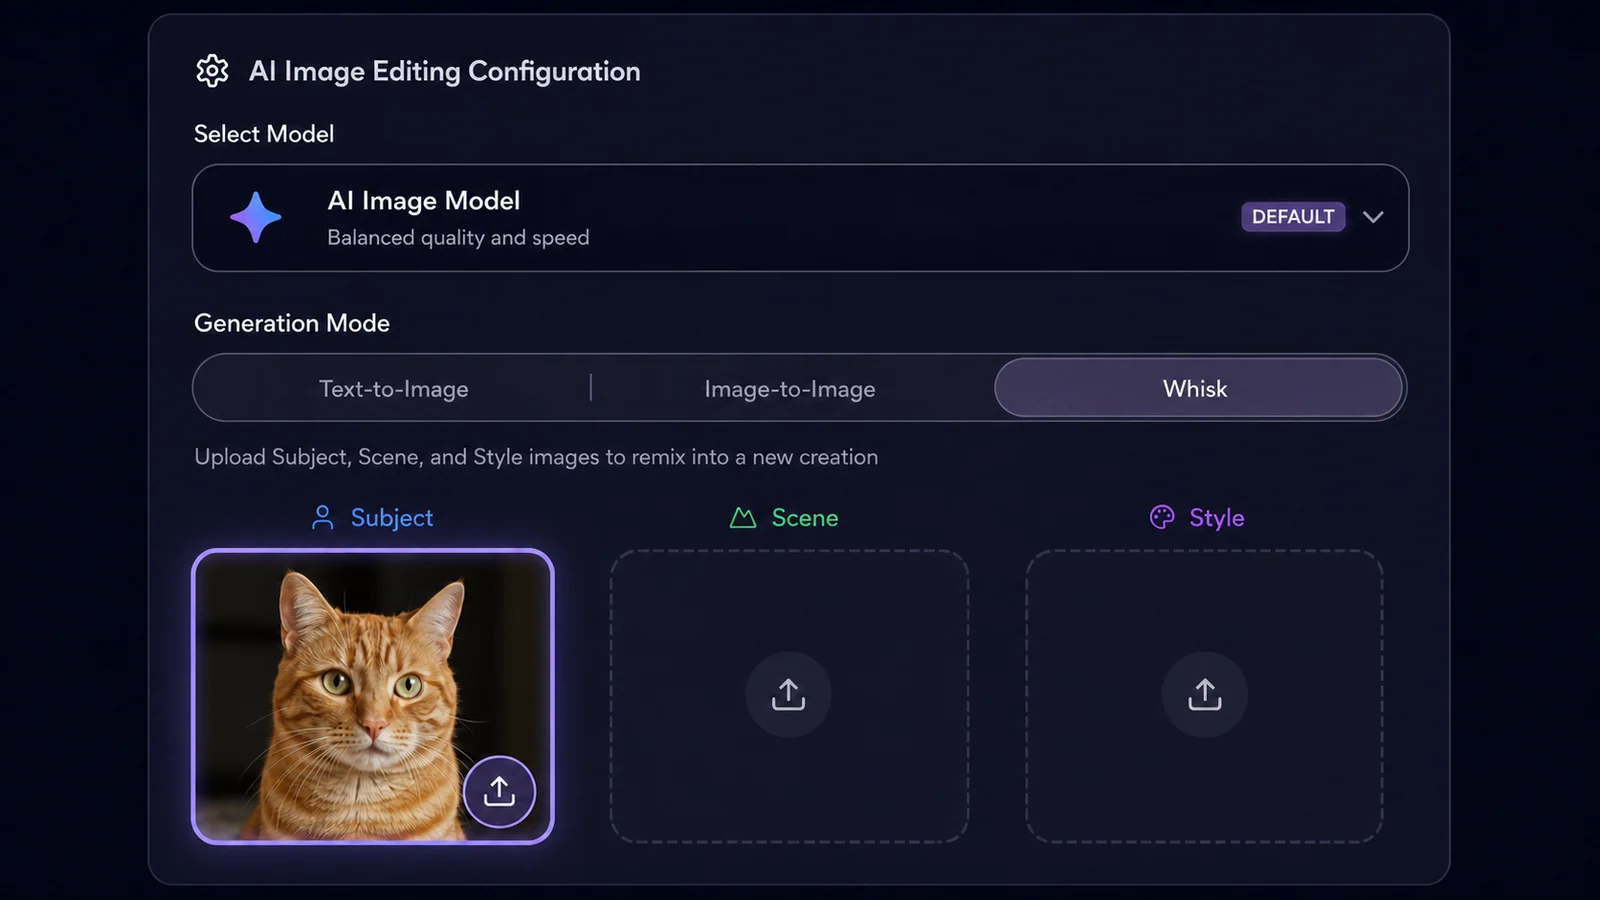
Put the character sheet or product packshot in Subject. This reference carries the defining identity or product details across the series.
2. Add the scene
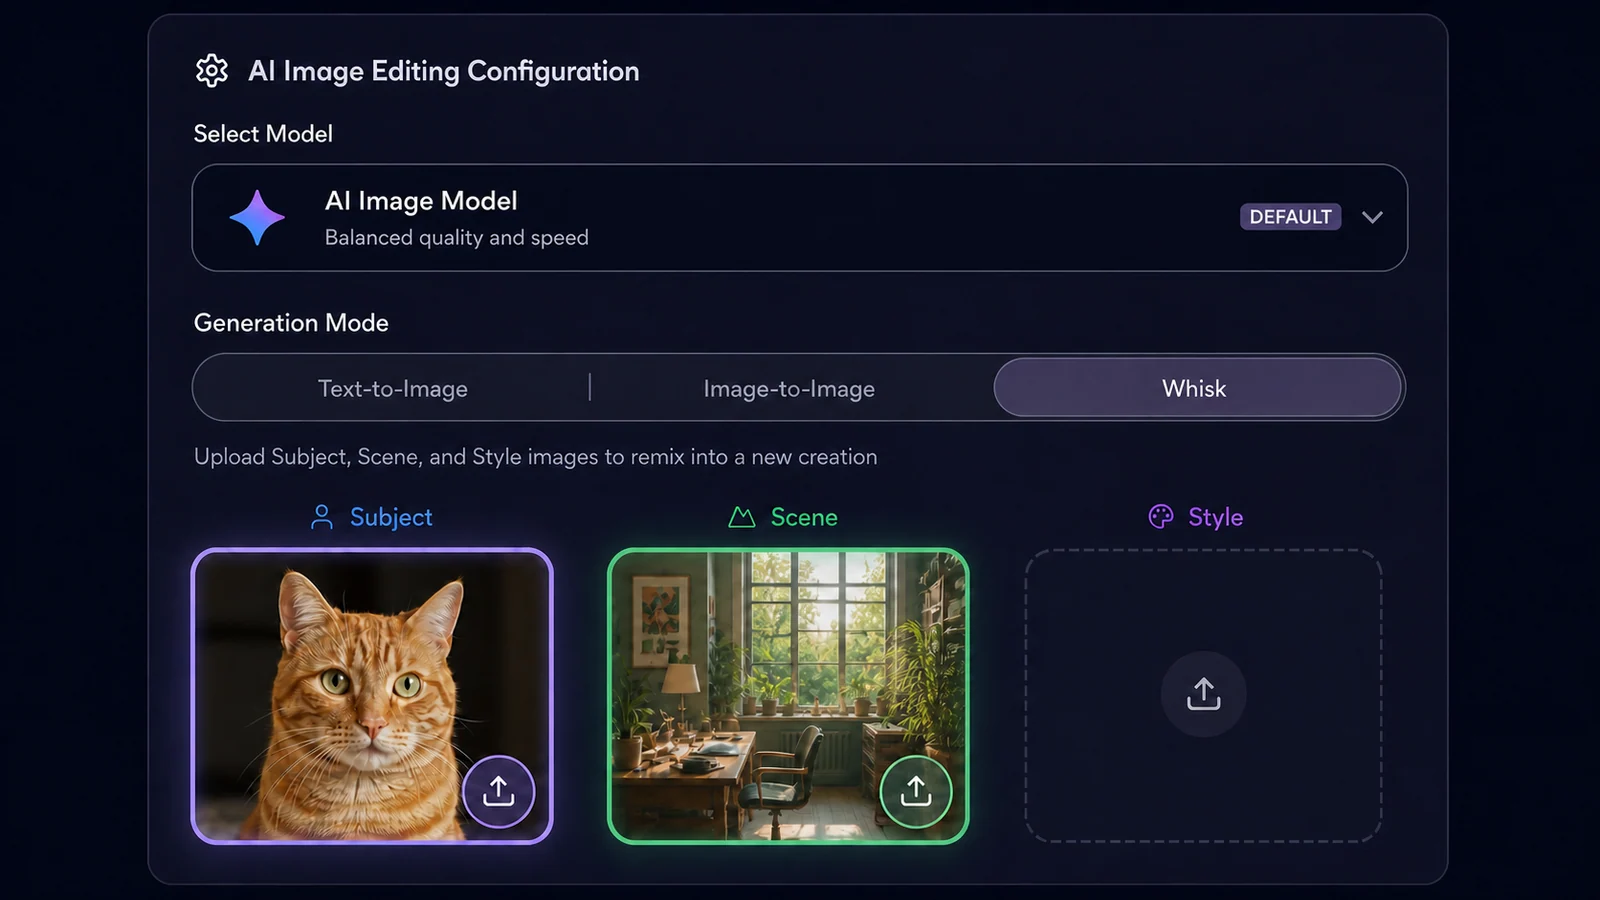
Put the target location, camera setup, or composition reference in Scene. Reuse the same scene across a batch when the environment should remain stable.
3. Apply the style
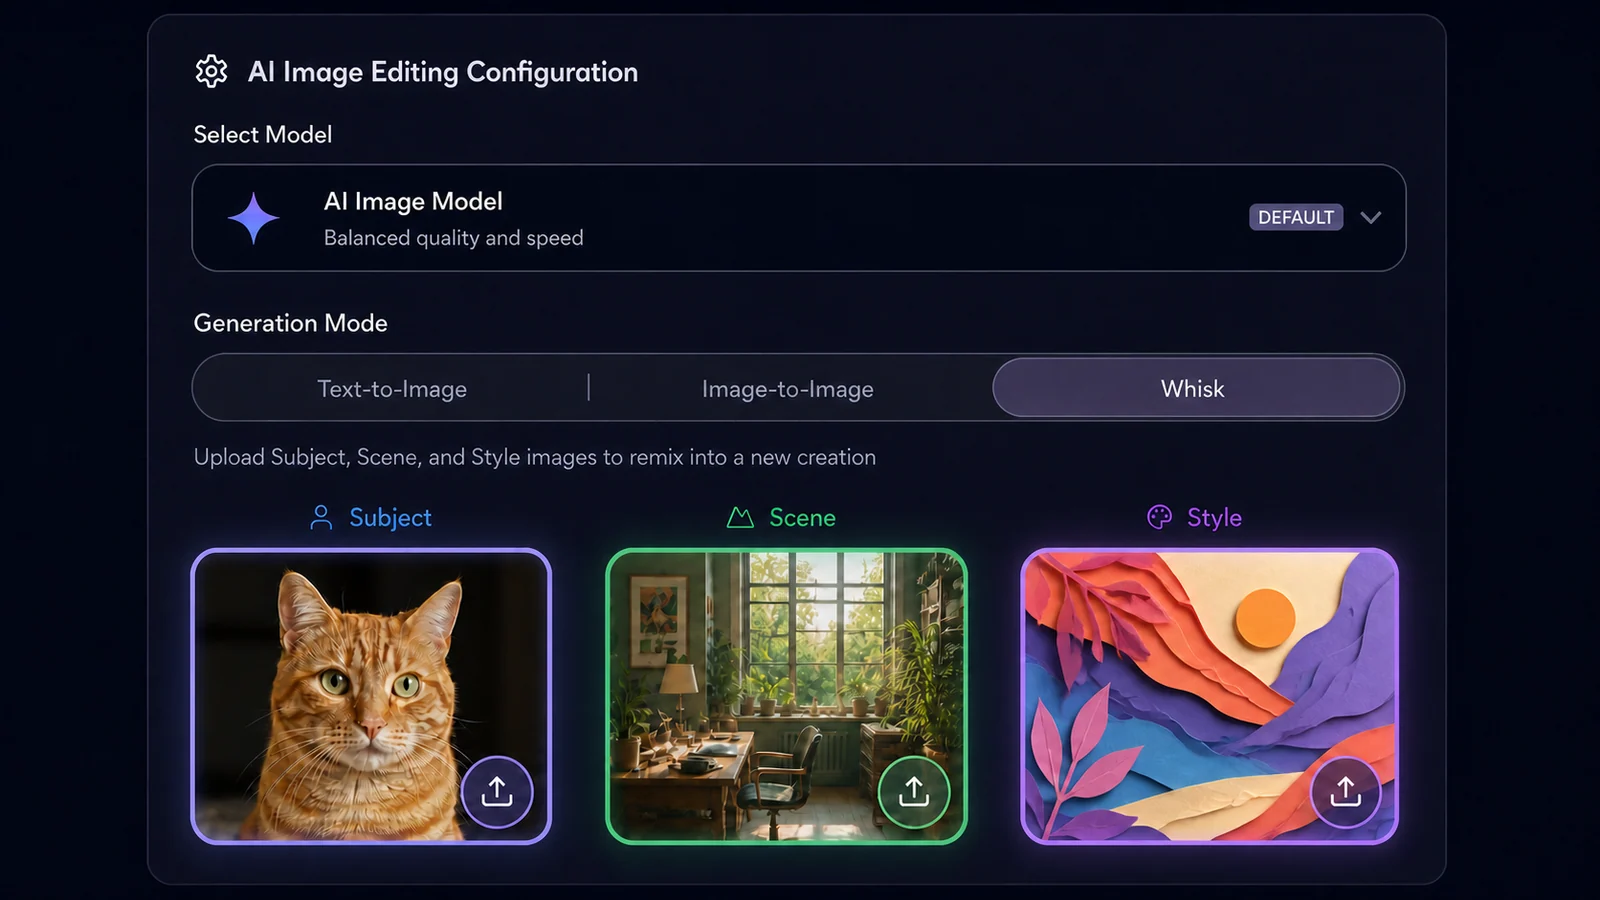
Put the palette, medium, lighting, or rendering reference in Style. Keeping it separate from the subject lets you change the visual treatment while retaining the core character or product.
4. Generate and refine
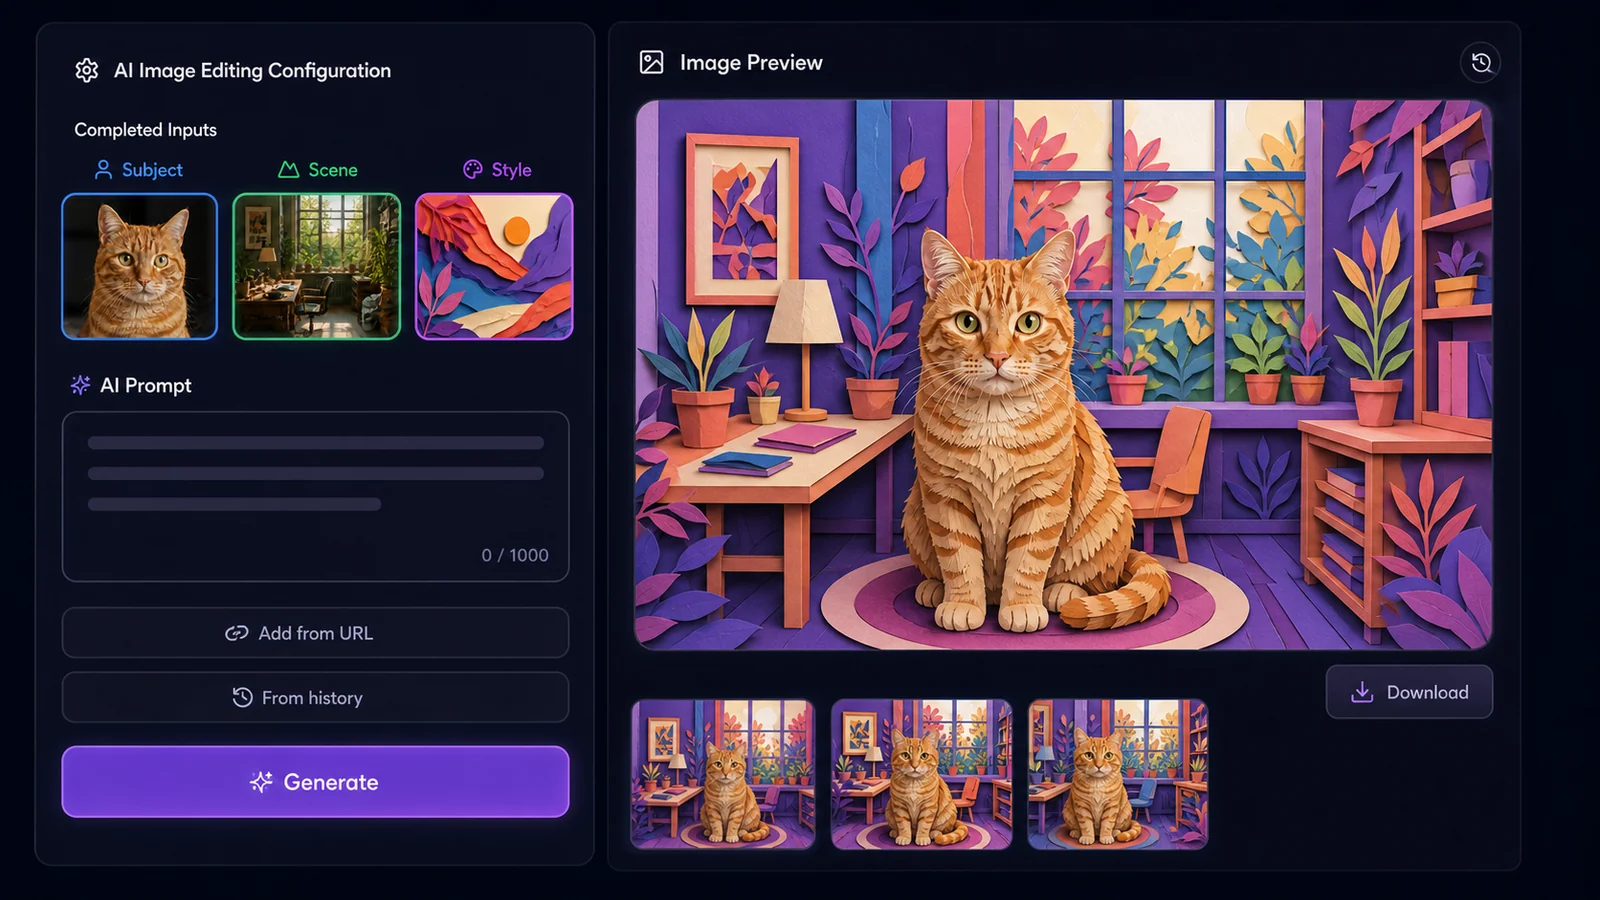
Whisk automatically generates the AI Prompt from the uploaded subject, scene, and style references. You can use that prompt directly. For finer control, optionally edit it to specify the details to preserve and a variable to change, such as pose, background, crop, or prop. The result view keeps the three references beside the generated image, so each revision can start from the same visual brief.
Whisk AI combines several controls that are especially useful for consistency:
- Dedicated reference roles: subject, scene, and style inputs do not have to compete inside one undifferentiated prompt.
- Multi-model choice: you can choose the image model and output settings that best fit a character, product, or campaign task.
- Image-to-image refinement: an approved source can remain the visual anchor while you request a controlled change.
- Reusable prompt structure: the same preserve, change, and avoid rules can be carried across every image in a series.
- Repeatable output controls: aspect ratio, resolution, and batch settings help keep deliverables aligned.
- Visible result history: accepted directions and earlier references can stay part of an iterative workflow.
Together, these controls keep a character or product recognizable across a series and make the workflow easier to reproduce than an unstructured sequence of prompts.
Character consistency and product consistency are different jobs
| Consistency target | Details to check across the generated series | What to lock in the brief |
|---|---|---|
| Character | Face shape, hair, age, skin tone, body proportions, clothing, accessories | Three to five identity anchors plus any fixed outfit or prop |
| Product | Silhouette, material, color, seams, controls, label position, logo placement | Shape, materials, fixed components, color, and product count |
| Brand series | Palette, lighting, camera distance, framing, typography space | One style reference, repeatable composition rules, and copy safe area |
A character can remain recognizable while clothing changes. A product often cannot change its cap, button layout, proportions, or label and still be accurate. Define what “consistent” means for the specific job before generating.
Build a consistency specification before opening the generator
Create a short list with two sections:
Locked attributes must stay the same in every image. For a character, this might be a round face, short black bob, green eyes, yellow raincoat, and red backpack. For a product, it might be a 3:1 height-to-width silhouette, amber glass, matte black cap, cream label, and centered circular mark.
Variable attributes are allowed to change. These might include pose, background, camera angle, weather, supporting props, or illustration style.
Keep the locked list short enough to inspect. If every visible detail is declared essential, the prompt becomes difficult to follow and the review has no priorities.
Choose references that isolate the identity
Use a subject reference with:
- A clear, unobstructed view of the character or product.
- Enough resolution to inspect defining details.
- Neutral lighting when exact color matters.
- Little background clutter and no competing subject.
- A crop that shows the attributes listed in the consistency specification.
Start with one clear hero reference, then add complementary views when they contribute new information, such as the back of a product, a character's full outfit, or a distinctive accessory. When you use multiple references, make sure they agree on the same identity rather than showing different revisions.
For a multi-angle series, create a small reference sheet with approved front, side, and three-quarter views. Do not mix images from different product revisions or character designs in the same sheet.
Give each reference one role
In Whisk mode, separate the visual jobs:
- Subject reference: controls who or what must remain recognizable.
- Scene reference: controls environment, layout, camera distance, or lighting direction.
- Style reference: controls palette, rendering, texture, and mood.
Avoid using a busy campaign image as all three references at once. If a scene image contains another prominent person or product, crop it or choose a cleaner environment. If a style reference contains a strong face or object, describe only the aesthetic qualities you want so those unwanted features do not transfer.
Use image-to-image mode when one source image is already close to the intended result and only a specific edit is needed. Use Whisk mode when subject, setting, and visual treatment come from different sources.
Use a preserve–change–avoid prompt
Start with the prompt Whisk automatically generates from your references. The templates below are optional refinements for a series that needs tighter direction; you do not need to write a prompt from scratch. When refining the generated prompt, address three questions:
- What must remain?
- What should change?
- What must not appear?
Character prompt template
Preserve the same character from the subject reference: [locked facial features], [hair], [body proportions], [fixed clothing or accessory]. Change only [pose, action, scene, or camera]. Place the character in [scene]. Use [style characteristics]. Keep [framing and lighting]. Do not change [identity anchors] or add [unwanted elements].
Example:
Preserve the same young adult character from the subject reference: round face, short black bob with straight bangs, green eyes, yellow raincoat, and red canvas backpack. Change only the pose and location. Show her waiting at a rainy train platform in a medium three-quarter shot, using soft editorial illustration with muted blue shadows. Do not change her age, hairstyle, eye color, coat, or backpack.
Product prompt template
Preserve the exact product silhouette, [material], [color], [components], and [label or control placement] from the product reference. Change only [background, lighting, camera angle, or supporting props]. Show one product in [scene and composition]. Do not alter dimensions, invent text, move controls, duplicate the product, or add accessories.
Example:
Preserve the exact bottle silhouette, amber glass, matte black cap, cream label placement, and centered circular mark from the product reference. Change only the background and lighting. Show one bottle on a pale stone counter with soft window light from the left, photographed at eye level in a 4:5 crop. Do not alter the cap, label proportions, glass color, or product count. Leave the small label text blank for later typesetting.
Leaving exact small text for a finishing step is safer than trusting generated lettering in a product claim or legal label.
Generate a baseline before building the whole series
The first goal is not variety. It is one approved identity baseline.
- Upload the clean subject reference.
- Use a simple scene and restrained style.
- Generate a small batch.
- Choose the candidate that best preserves the locked attributes.
- Record the model, prompt, aspect ratio, resolution, and references.
- Keep both the original source and approved baseline.
Use the same saved configuration for the next image. Change only the scene, pose, or other intended variable. If the second image fails, the controlled difference makes the cause easier to identify.
Always return to an approved anchor
Repeatedly editing an edited image can compound small errors. A slightly changed jawline, bottle shoulder, logo position, or garment detail may drift further with every generation.
Use this anchor order:
- Original reference supplied by the owner or creator.
- Approved reference sheet or product packshot.
- Approved generated baseline, only when it accurately preserves the original.
- Latest generated image only when continuity of pose or composition is more important than exact identity.
If identity matters most, return to level 1 or 2 for each new scene.
Review with a fixed scorecard
Do not approve a result because it “feels close.” Compare the same attributes every time.
Character check
- Face shape and apparent age
- Eye color and spacing
- Hairline, length, and part
- Body proportions
- Fixed clothing and accessories
- Number of fingers and limb structure
- Character count and relative height
Product check
- Overall silhouette and proportions
- Material and surface finish
- Color under the intended lighting
- Buttons, seams, ports, cap, or handle
- Label and logo position
- Correct number of products
- Packaging text and regulatory details
Series check
- Aspect ratio and safe area
- Camera distance and lens feel
- Key-light direction and shadow softness
- Palette and contrast
- Space reserved for copy
- Background complexity
Record why a candidate failed. “Wrong cap shape” is actionable; “not good” is not.
Fix the source of the drift
| Symptom | Likely cause | Best next change |
|---|---|---|
| Face changes between scenes | Subject is small, obscured, or weakly described | Use a tighter reference and repeat three to five identity anchors |
| Outfit changes with the style | Style reference contains competing clothing | Remove or crop the competing figure; lock the outfit in text |
| Product becomes wider or taller | Scene perspective or camera instruction dominates | State the fixed silhouette and use a less distorted scene reference |
| Product color changes | Style palette and product color conflict | Name the exact product color as locked and reduce style influence |
| Logo or label mutates | Generated text and fine marks are unstable | Preserve placement, then apply exact artwork during finishing |
| Extra copies appear | Count is not explicit | State “one product only” or the exact character count |
| Later images drift farther | Generated outputs are being used as new identity sources | Return to the original or approved reference sheet |
| Style varies across the series | Different style references or vague wording | Reuse one approved style reference and the same style description |
When fixing an error, change one thing: the reference, one prompt clause, the scene, or the style strength. Changing everything makes the successful adjustment impossible to identify.
A practical series workflow
For a five-image character or product series:
- Define the locked and variable attributes.
- Prepare one approved subject reference set and one style reference.
- Create and approve one neutral baseline.
- Duplicate the baseline prompt and settings.
- Replace only the scene or action for image two.
- Compare image two with the original anchor, not just image one.
- Continue one scene at a time.
- Run the complete series through the same review scorecard.
- Correct exact text, logos, and tiny product details in an editor.
- Archive inputs and settings with the accepted files.
This method is slower than generating many unrelated variations at once, but it gives you a traceable reason for each change and reduces expensive rework.
Use Whisk AI as the consistency engine, then finish exact production details
Use a conventional image editor after generation when the deliverable requires:
- Pixel-exact logos or packaging text.
- Independently editable layers.
- Legally approved claims or regulatory copy.
- Exact product dimensions or engineering details.
- Reliable color matching for print.
- A final composite assembled from approved assets.
Whisk AI can help establish a repeatable subject, composition, lighting, and campaign direction across a series. When a deliverable also needs exact legal copy, production artwork, or layered handoff, use an editor for those finishing details and verify every generated element against approved source assets.
FAQ
Can Whisk AI keep the same character in every image?
Yes. Reuse the same clean subject anchor, repeat defining facial and clothing attributes, and change one scene variable at a time to keep the character consistent across every image.
How many character references should I use?
Start with one clear reference. Add a second angle only if it supplies necessary information. Conflicting references can reduce consistency.
Should I use the previous generated image as the next reference?
Use it when pose or scene continuity is the priority. When identity accuracy is the priority, return to the original or approved reference sheet to avoid cumulative drift.
How do I keep a product logo accurate?
Use the product reference and lock the logo position, proportions, colors, and packaging details in the prompt so the generated series preserves the brand identity.
Does using the same prompt guarantee consistency?
The same prompt is a strong starting point, and it works best when the references, model, settings, and review criteria stay consistent too. Save the whole recipe rather than only the words.
Start with one approved anchor
Whisk AI gives creators a structured way to build a coherent visual series from one approved character or product. Lock the identity, separate the reference roles, approve one baseline, change one variable, and carry the defining details into every new scene. Open the Whisk AI image workspace with a real character sheet or product packshot and build the first baseline before expanding into new scenes.
If you are deciding which reference-led tool fits this workflow, read 4 Best Google Whisk Alternatives for Reference-Based Creation.
Sources
- Whisk AI image workspace
- Whisk AI Terms of Service
- Google's original subject, scene, and style reference explanation
Sources and current Whisk AI interface last checked October 15, 2026.